'Top Rope Climbing: How To Belay' is part of the book - Rock Climbing Basics: The Beginner's Guide.

This article explains how to belay for top rope climbing.
Using a belay device makes it possible for the belayer’s limited grip strength to control the large forces generated in a fall. How easy this is depends on:
- The belayer’s grip strength
- The weight of the falling climber
- The diameter of the rope
- The angle of separation between the rope strands
In most cases, it is very easy to stop a fall once you have mastered the techniques. However, it’s important to understand that heavier climbers and thinner ropes make it more difficult. To compensate for this, consider wearing leather belay gloves for extra grip.
There are 3 main techniques that you'll need to master to top rope belay safely:
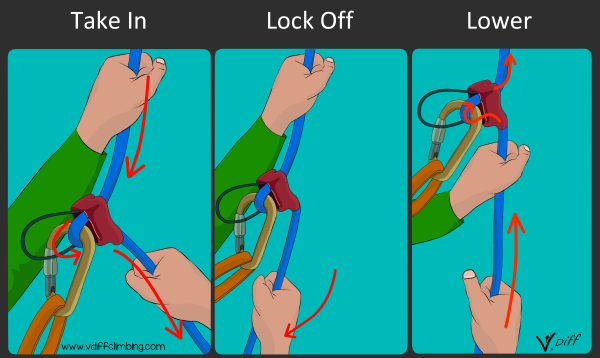
Note: The descriptions on the following pages assume that you’re right-handed (i.e: your right hand never leaves the brake rope). Feel free to switch right and left hands if it works better for you.
The Angle of Separation
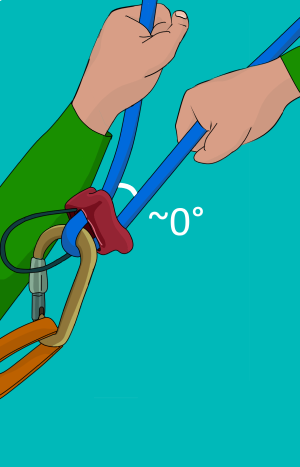
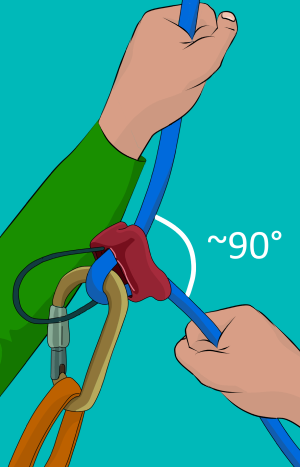
To safely operate a belay device, you must first understand the angle of separation. This is the angle between the rope strands which determines how much friction is produced. More friction makes it easier to hold a fall.
Little friction is produced when approaching 0 degrees. In this position, you have very little control over the belay and it is impossible to hold a fall.
Some friction is generated as the angle increases to 90 degrees. Depending on the design of your device, this is a good angle for taking in rope.
At the maximum angle of 180 degrees, enough friction is generated to control the full force of a fall. This is the most effective lock-off position.
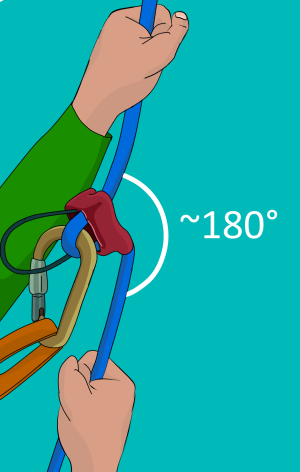
How To Belay: Locking Off The Rope
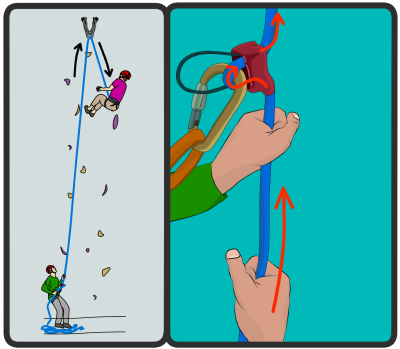
To hold a climber's weight on the rope, you need to 'lock off' the belay device. Remember that the climber could fall off without warning, so you have to be ready to catch them at any point.
Step 1
Move your right hand down towards you. This causes the rope to kink through your belay device, which creates the friction needed to hold a fall.
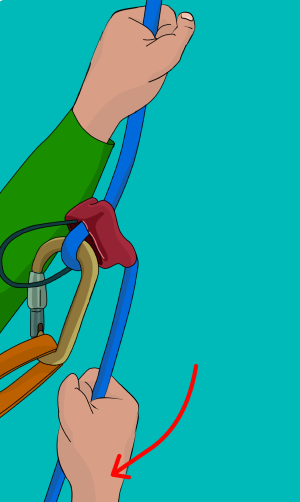
Step 2
Hold the rope tight.
If you are holding the climber for a while, it can be more comfortable to hold the brake rope with both hands.
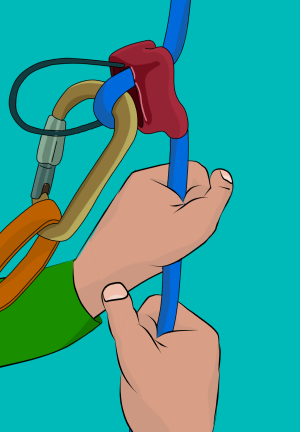
How To Belay: Taking In Rope
As the climber moves up the wall, you'll need to take in the extra rope that is created. You should aim to keep the rope tight enough so they won’t fall any distance, but slack enough so you don’t interfere with their movement. Watch the climber carefully so you can take in rope appropriately as they move up.
Step 1
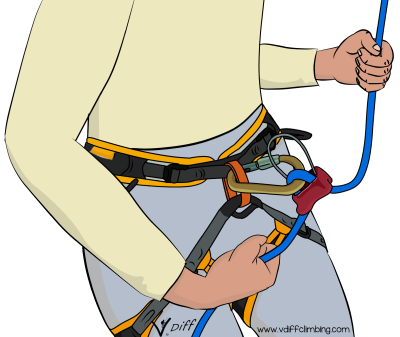
Put your left hand on the live rope above your belay device, and pull down to take in the slack rope. Your right hand should be on the brake rope below your belay device.
At the same time as your left hand pulls down, move your right hand slightly up (keeping hold of the rope), so the angle of separation is around 90°. This makes it easier to pull the rope through the device.
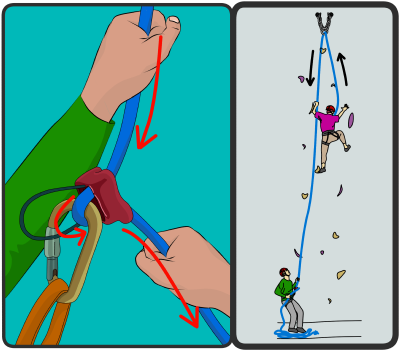
Step 2
Move your right hand back down towards you to ‘lock off’ the device.
Make sure you perform these two steps quickly. If the climber falls as you're taking in, it's harder to hold them.

Step 3
Your right hand will now be further down the rope towards the ground. You'll need to move it back up towards your belay device before you take in any more rope. It's important that you do this without letting go of the rope.
Bring your left hand down and grab the brake rope just below your right hand. Hold on tight with your left and loosen your grip with your right hand. Then slide your right hand back up the rope to just below your belay device.
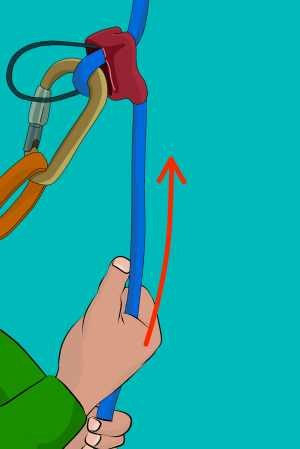
Step 4
Now you're 're-set' and ready to take in more rope.
It's easiest to only take in about 20-30cm of rope at once.
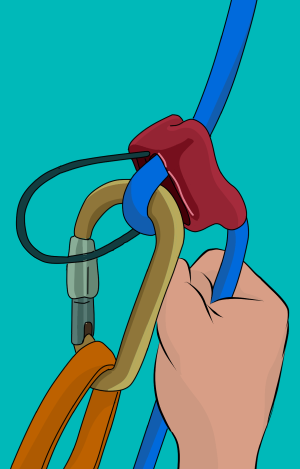
How To Belay: Lowering The Climber
When the climber reaches the top, or just wants to come down, you'll need to lower them.
Step 1
Take in any remaining slack and lock off the rope. You should be able to feel the climber’s weight on the rope. Hold the rope in both hands, with your left hand above your right.

Step 2
Keep hold of the rope with your right hand and loosen the grip with your left.
Move your right hand upwards so some rope slides through your left hand and then through the belay device. This will lower the climber a short distance.
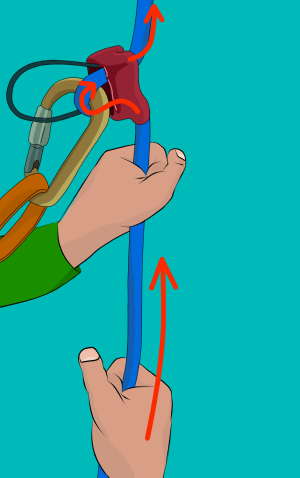
Step 3
Once your right hand is up against your left, hold on tight with your left to lock off the rope. Then slide your right hand back down.
Repeat this over and over until the climber is back down on the ground.
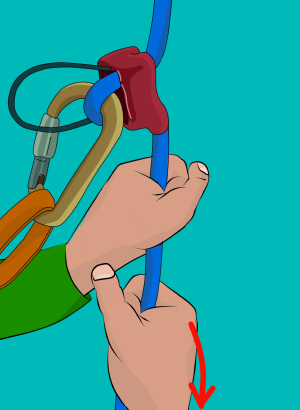
Step 4
The climber should lean back on the rope, with their feet against the wall in front of them, as if they're sitting in a chair. The climber 'walks' their feet down the wall as they are being lowered.
Make sure to lower the climber slowly and in control so they don't bash into the wall.
Step 5
Slow down when they are close to the ground so they have time to regain balance in the horizontal world.
Good Belaying Technique
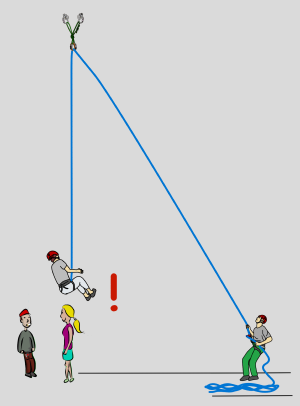
- Ready to take in, give slack or lock off
- Rope fairly tight
- Hands correct distance away from belay device
- Tight grip on rope
- Holding the brake rope in the correct downwards direction
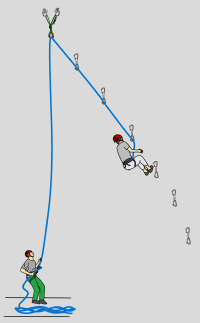
Warning! Top Roping on Overhangs
When top roping on overhangs, climb on the rope which is clipped through the quickdraws.
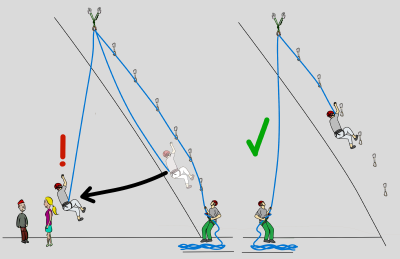
Then clip the rope back through the quickdraws on your way down.
Warning! Keep Hold of the Rope
When belaying, you need to keep at least one hand on the brake rope all the time. This is what stops the climber from falling to the ground. Letting go of the brake rope is like letting go of the steering wheel while driving on a fast country road. Avoid the temptation to loosen or release your grip, even just for a second.
Use your other hand to wave to friends, get something out of your pocket or scratch your butt. Or better yet, just wait until you’ve finished belaying. Your partner’s life is literally in your hands. If they fall while your hand is loose or off the rope, you probably won’t catch the fall.
