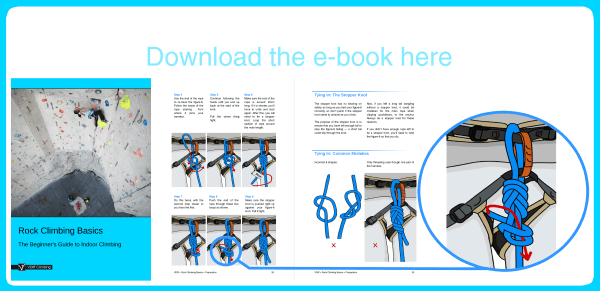
This article is part of the book - Rock Climbing Basics: The Beginner's Guide.

Climbing Gear: Overview
Rope
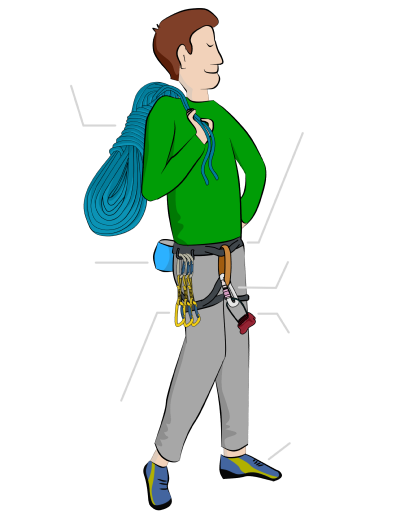
Your rope is the main piece of climbing gear. It connects you, via your harness, to the quickdraws on the wall and to your climbing partner. Ropes have an inner core and an outer sheath.
Harness
Your harness keeps you safely attached to the rope. It is made of really strong, flat webbing, with buckles to fasten it tight and padding to make it comfortable.
Screwgate Carabiner
There are two main types of carabiner: screwgates and snapgates. A screwgate has a rotating tube which can be fastened over the 'nose' of the carabiner. This stops it from being opened accidentally.
Belay Device
A belay device is a metal tube that you use together with a screwgate carabiner. The rope is fed through the belay device and carabiner, and the belayer holds the rope underneath. If weight is applied to the rope (e.g. if the climber falls) a huge amount of friction is created so that it is easy to hold their weight and stop them falling.
Quickdraws
A quickdraw is the 'clippy thing' that attaches your rope to the wall. They're made up of two snapgate carabiners which are joined together with a fabric sling.
Shoes
Special climbing shoes make standing on small bits of rock a lot easier! They are designed to be tight fitting (like a sock) and have a rubber sole that sticks to rock really easily.
Chalk
Chalk is kept in a small bag with a draw-cord closure at the top that you can dip your hands into to 'chalk up'. The chalk is used to stop your hands getting too sweaty to hold on to the rock.
Climbing Gear: The Harness
Gear Loops
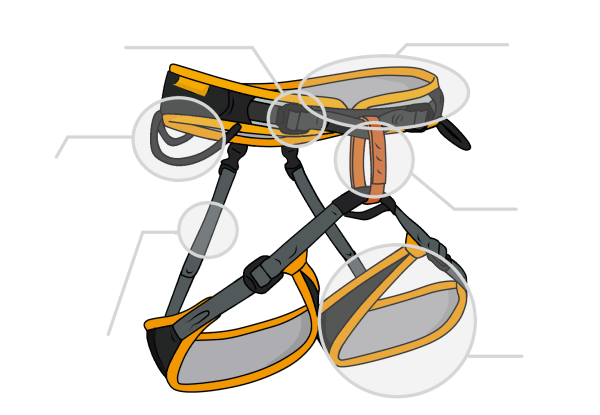
These low strength loops are for clipping climbing gear to, such as carabiners and quickdraws. This way, you can take gear with you as you climb.
Buckle
These can be used to adjust the size of your harness for a comfortable and tight fit. It's important that they are fastened correctly.
Waist Belt
This fastens around the smallest part of your waist.
Elastic
These low-strength stretchy pieces of fabric help to stop your leg loops from sliding down at the back. They can be adjusted too.
Leg Loops
These fasten around the top of your thighs.
Belay Loop
This super strong loop connects the waist belt to the leg loops. You use it to belay from (more on this later). It's important not to get this confused with gear loops or any other part of the harness.
Choosing a Climbing Harness
Trying a Harness On
Climbing harnesses are made in different sizes and shapes with different amounts of padding. It's worth going to your local shop and trying some on rather than ordering online.
Select a few harnesses that fit correctly, then hang in them. Good shops will have a facility for you to do this.
The leg loops should hold most of your weight, with the waist belt supporting your upper body so you don’t tip upside-down.
Leg Loops
Harnesses either have fixed size or adjustable leg loops. They should fit closely around your thighs without hindering movement. Adjustable leg loops are useful if you plan to climb in cold environments where you'll need to wear thicker pants, or if the fixed size options just don't quite fit.
Waist Belt
The waist belt should fit around the smallest part of your waist, above your hips. It needs to adjust small enough to fit tight over a t-shirt, with enough adjustment to get it on easily or wear a jacket underneath too.
The Rise
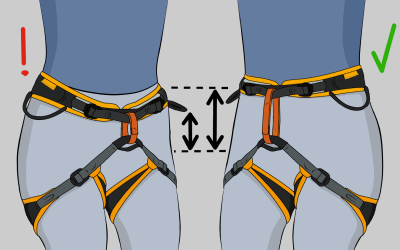
The rise is the distance between the waist belt and leg loops. Think of it as the measurement between your belly button and crotch. Women's harnesses tend to have a bigger rise, to fit women's body shapes better.
If the rise is too short, you won't be able to get the waist belt all the way up to the smallest part of your waist.
Climbing Gear: Carabiners
Carabiners (often shortened to 'crab' or 'biner') are the mainstay of the climbing system. They're used to attach the rope to pieces of equipment, or to join two or more pieces of equipment together. Carabiners are generally made of aluminium. Shapes vary, but it's always some kind of elongated triangle or oval, with an opening gate on one side to allow you to easily clip and unclip stuff. There are two main types: snapgates (non-lockers) and screwgates (lockers).
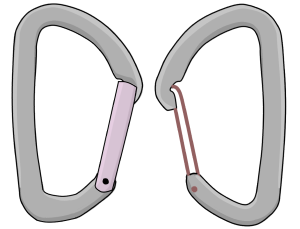
Snapgates are the simplest carabiners. They're used for clipping the rope to gear, but not for anything really important such as belaying or anchors. The gate can be made out of solid metal or a loop of wire: both work in the same way. Snapgates cannot be locked. Instead, a spring system snaps the gate shut.
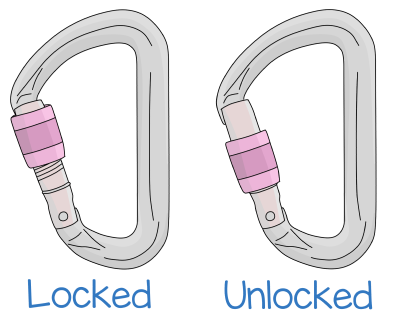
Screwgate carabiners are used when you need to be 100% sure that the gate won't pop open. They're slower to use than snapgates, but safer. The gate features a rotating tube which spirals around a screw thread. The gate is locked when the tube is positioned over the carabiner’s nose. To unlock it, simply unfasten the screw. Don't be tempted to tighten the screw too much – it’ll be hard to unfasten.
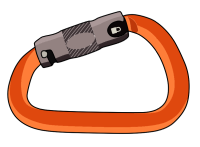
You may also come across autolocking carabiners. The locking tube on these isn't threaded, but instead springs into place and needs twisting in a certain way to unlock. They're just as safe as screwgates, but can be fiddly to use at first.
How Strong are Carabiners?
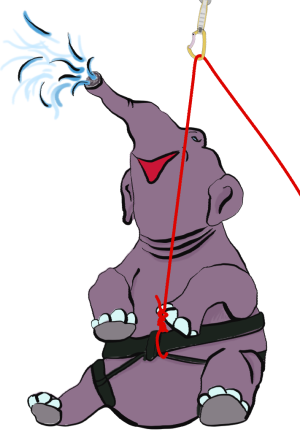
Climbing carabiners are always rated to at least 20kN (kiloNewtons). You don't need to understand the numbers, but that's REALLY strong. Strong enough to hold an elephant.
They are weaker if you 'cross load' them (load them sideways) or load them with the gate open (another reason to use screwgates for important stuff).
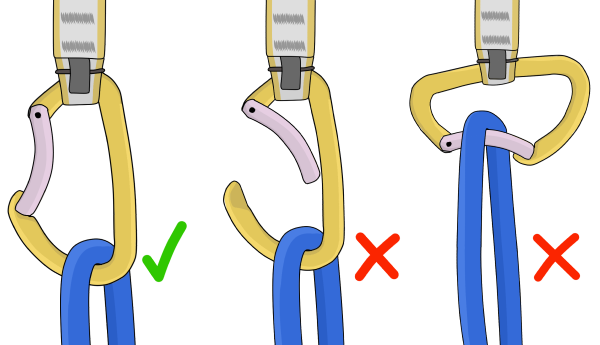
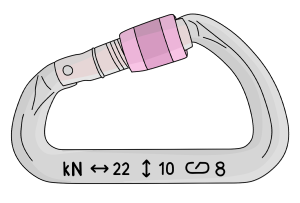
The kN rating will always be written on the side of the carabiner; this is how you know your carabiner is safe for climbing and not just for your key chain.
How Many Carabiners Do I Need To Start Climbing?
Here's the good news: probably just one! When you're starting out at the climbing wall, you'll just need one screwgate carabiner for your belay device.
If you want to climb outside, you can build up a climbing rack over time that will include a lot of carabiners. There's no rush though; learn the basics first.
Climbing Gear: Quickdraws
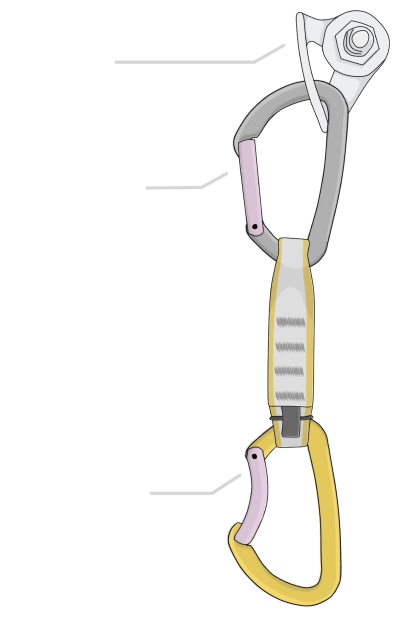
A quickdraw (or just 'draw') is the 'clippy thing' that attaches your rope to the rock. They're made up of two snapgate carabiners with a fabric sling (known as a dog-bone) to join them. Using just one carabiner on a bolt would cause the rope to get tangled in it - a quickdraw spaces the rope safely away from the bolt.
Most walls will require 4-10 draws for the height of the routes. Check with the staff how many you'll need before you start climbing up. Quickdraws are available in many different lengths with a huge combination of carabiners. But some between 10-12cm long will be just fine to start out with.
Bolt
The quickdraw needs to be attached to something in the rock to hold it there. At the wall this will be a bolt. Many indoor walls already have quickdraws attached to the bolts for you. If yours doesn't, you'll need to bring your own.
Bolt-End Carabiner
Quickdraws are made up of a bolt-end carabiner and a rope-end carabiner. The bolt-end carabiner is the one which moves freely on the fabric sling, and is the one which you clip to the bolt.
Rope-End Carabiner
The rope-end carabiner usually has a curved gate and is 'held in' with an elastic or rubber loop. You clip the rope through this carabiner.
It's important not to get these two carabiners mixed up. The sharp edges of bolts can notch the bolt-end carabiner, which will damage your rope if you swap them over. We recommend using quickdraws with different coloured carabiners so it is easy to identify them.
Climbing Gear: The Belay Device
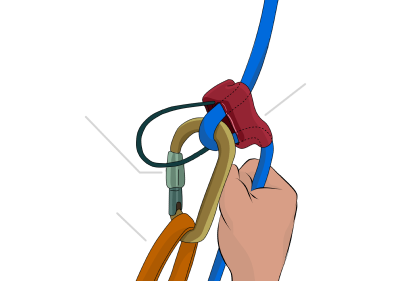
A belay device is a metal tube that you use together with a screwgate carabiner. The rope is fed through the belay device and carabiner, and the belayer holds the rope underneath.
If weight is applied to the rope (e.g. if the climber falls) a huge amount of friction is created so that it is easy to hold their weight and stop them falling.
Assisted Braking Belay Devices
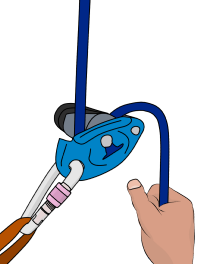
Some belay devices, such as the Petzl GriGri have 'assisted braking', which means they lock almost by themselves if the climber falls. They must be used differently to normal belay devices.
Learn how to belay with a GriGri.
Climbing Shoes
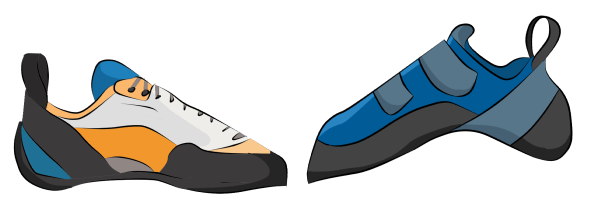
Special climbing shoes make standing on small bits of rock a lot easier! They are designed to be tight fitting (like a sock) and have a rubber sole that sticks to rock really easily. There are many types of climbing shoe on the market. To get the best fit, you should try a few different pairs on before you buy.
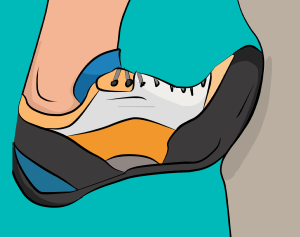
Look for something that's quite flat and stiff soled. If it's too downwards bent ('aggressive') they'll probably make your feet hurt. These are designed for much harder climbing than you'll be doing to start with.
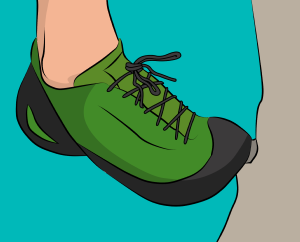
Really flexible shoes will also be painful on your feet. Pick something stiffer until your feet get used to balancing on the end of your toes.
Climbing shoes come with different fastenings – lace up, velcro or elastic. Just pick whichever you like – lace up or velcro offers the most adjustment.
Climbing Shoe Size
Which size you buy is also important. It will feel strange to wear such tight shoes to start out with. Pick a size where your toe is snug into the end of the shoe, but not crunched up.
Climbing shoes are sized just like normal shoes, but different brands tend to fit differently. Just start trying on whichever size you would normally wear and go up or down from there. If you shop online, make sure you know exactly what size and type of shoe you need.
Climbing Shoes: Keeping them Fresh
Most climbers prefer to wear shoes without socks, for increased sensitivity. This can cause your shoes to smell terrible after a while. Don’t leave sweaty shoes buried in your bag for days – air them out after each climb and use shoe fresheners when you store them.
Climbing Chalk and Chalk Bags
Most climbers use a chalk bag and chalk. The chalk absorbs sweat, and therefore increases friction between your hands and the rock.
Chalk is available either loose or in a small mesh ball. Using a ball is easier and less messy to start with, and many indoor walls don't allow loose chalk.
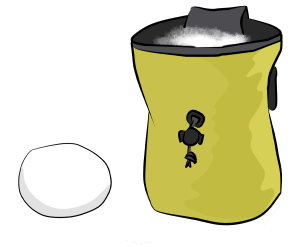
You'll also need a chalk bag to put it in. This is a small bag with a draw-cord closure at the top that you can dip a hand into to 'chalk up'.
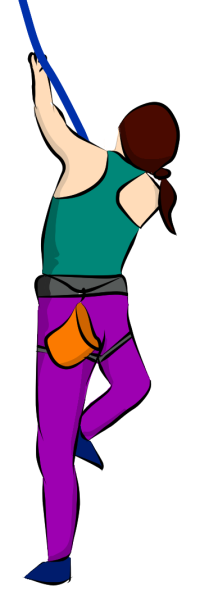
You can either attach the chalk bag to your waist with a piece of cord or a webbing belt. Alternatively, clip it to the back of your harness with a carabiner.
